
The Ultimate Winter Roof Maintenance Checklist for Indiana Businesses
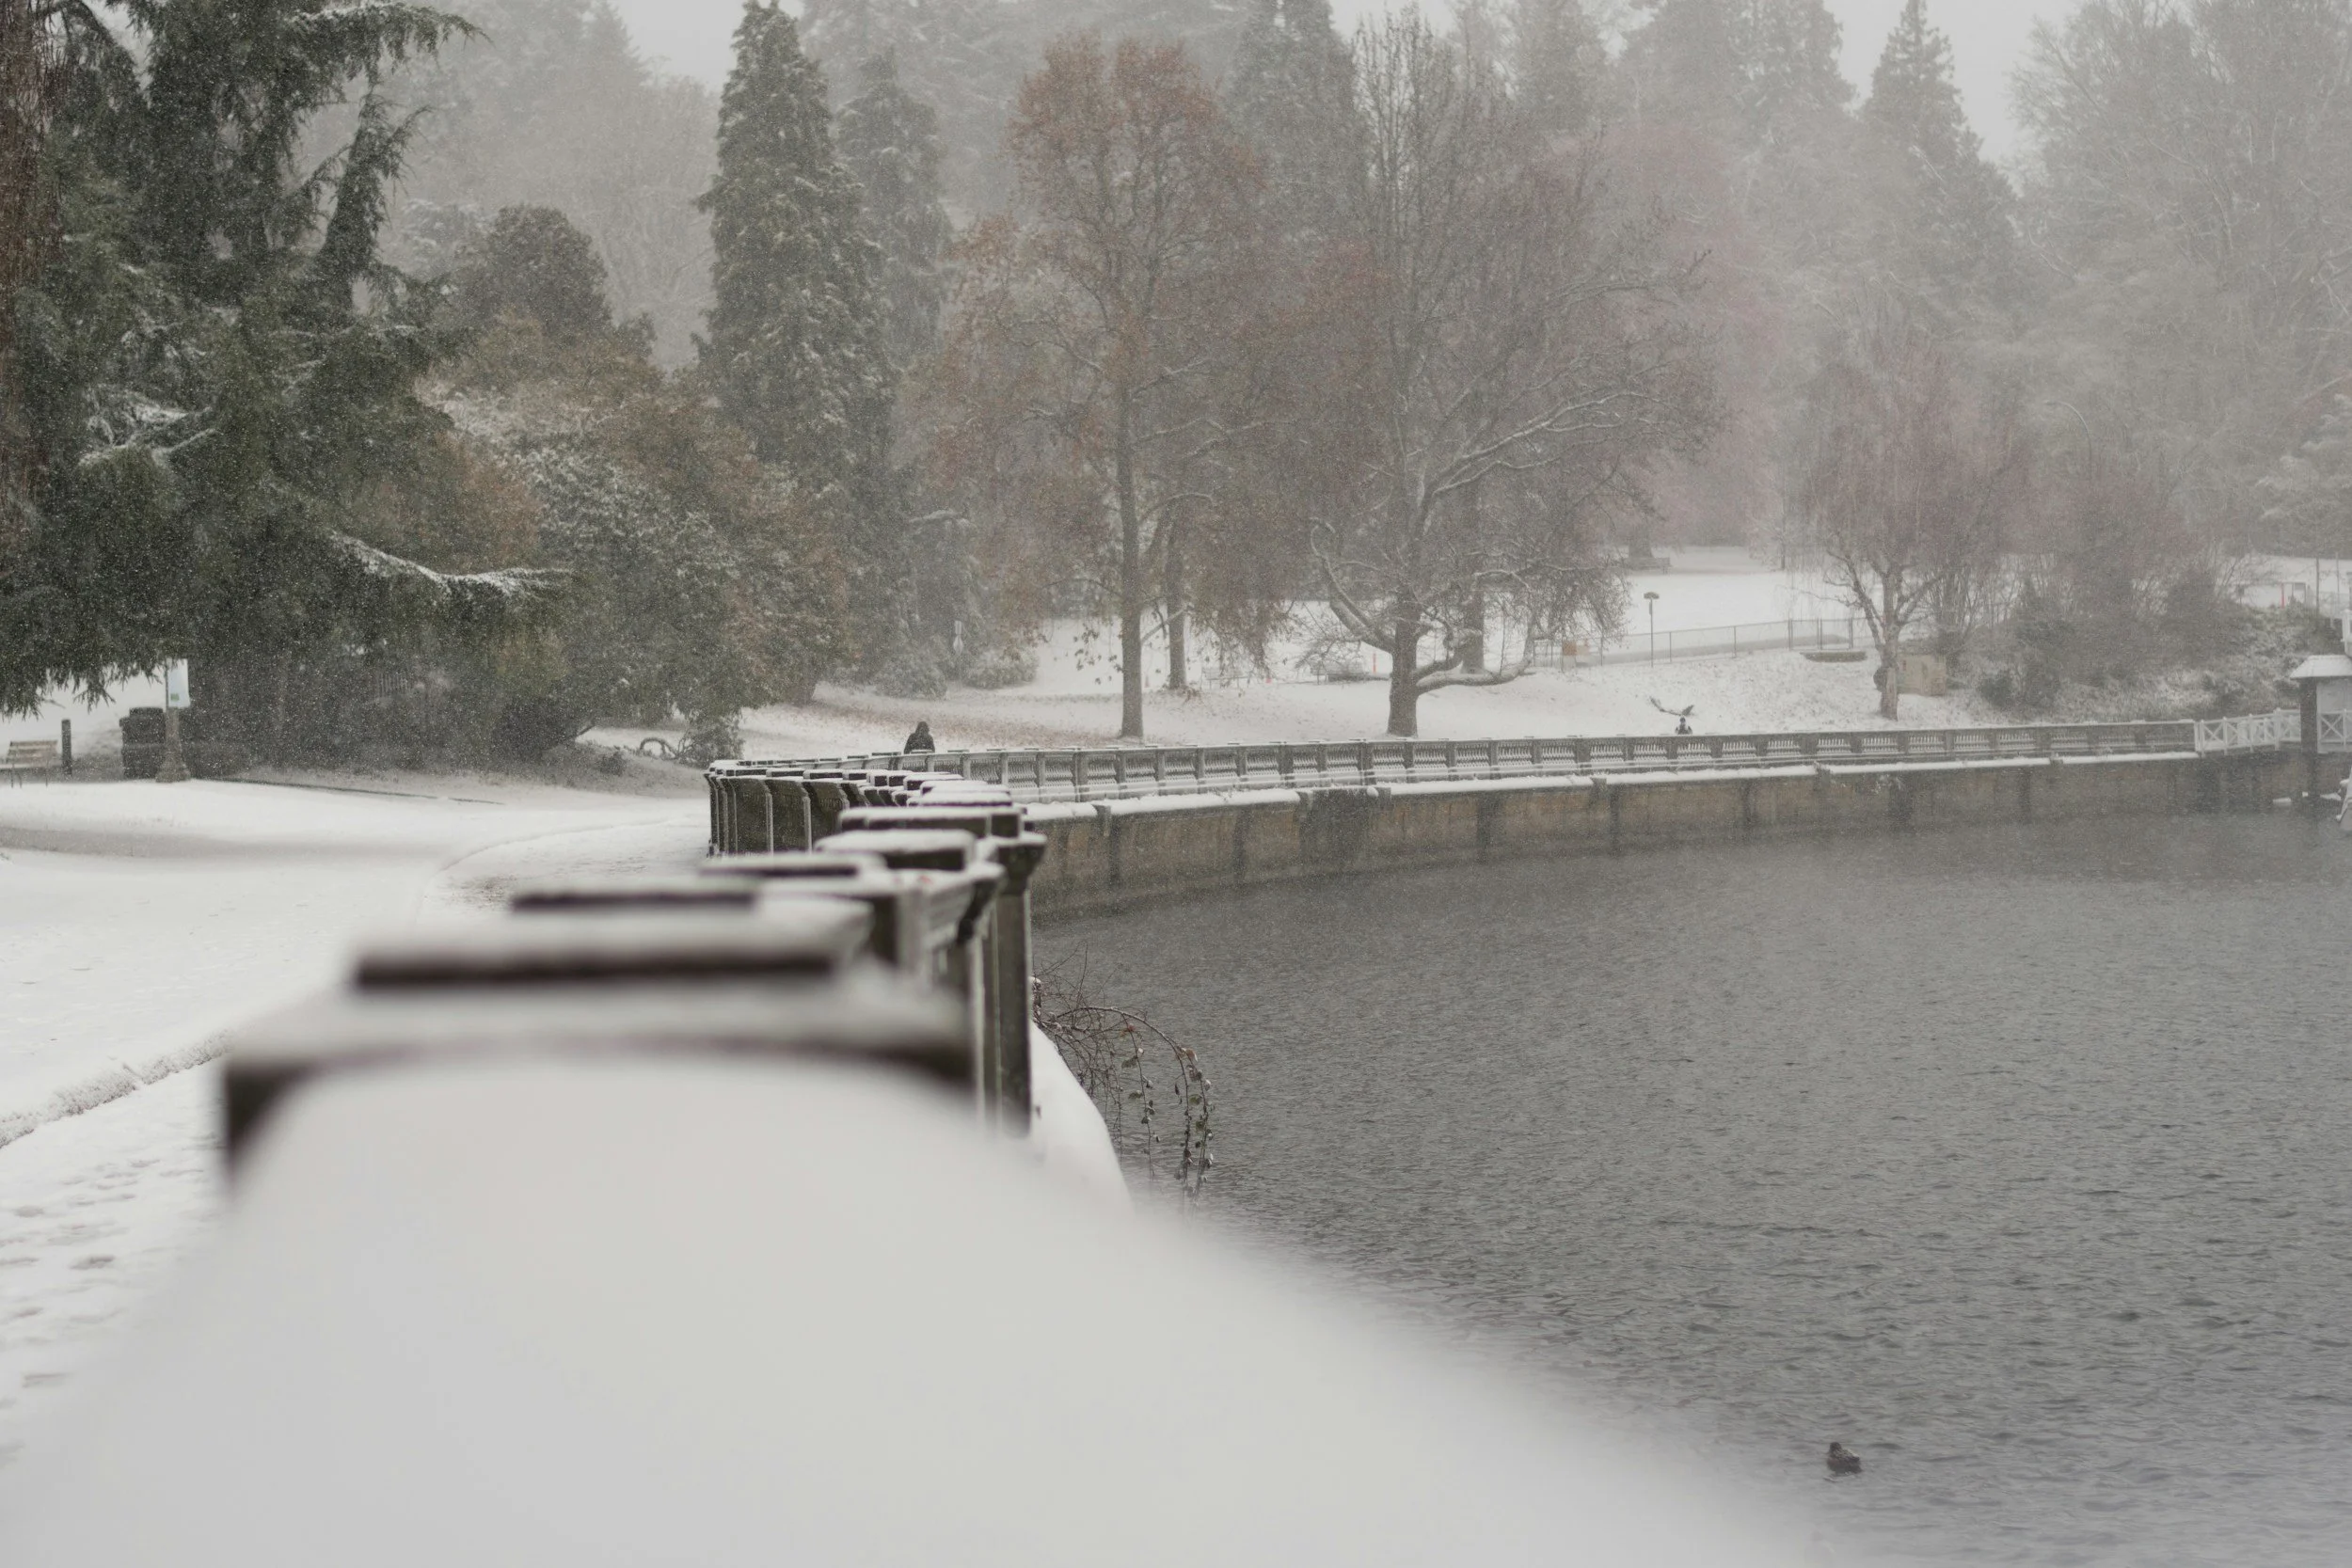
Winter hits commercial roofs in Indiana harder than most people realize. Our weather swings fast here. One week you might see heavy lake-effect snow. The next week it melts, refreezes, then refreezes again. All of that puts real strain on flat and low-slope roofs across the state.
Most leaks we’re called out to in December through March come from problems that were already developing in the fall. Small cracks in seams. Loose flashings. Clogged drains. Once the temperature drops, those little issues become big headaches. And when water freezes, it expands. That expansion forces its way into weak spots and opens the roof up even more.
The good news is that winter roof trouble is almost always preventable. A solid maintenance routine protects the building, keeps heat inside, and helps you avoid expensive downtime. It also extends the life of the roof, which saves money long-term.
Business owners in Elkhart (where we’re based out of) and the rest of the state, who stay ahead of winter usually end up with far fewer surprises.
This guide walks you through a simple, practical checklist you can use all season. Nothing complicated. No roofing jargon you need a dictionary for. Just clear steps that help you keep your commercial roof in good shape until spring.
Here’s what to look for, and how to stay ahead of the weather this winter.
Check the Roof Surface Before Temperatures Drop
Before winter sets in across Indiana, one of the smartest moves a business owner can make is to take a close look at the roof surface. This step alone prevents a huge percentage of winter leaks. In fact, we see the same pattern every year. The roofs that struggle the most in January and February are the ones with issues that were sitting there in November.
Think about what happens in our part of the country. Northern Indiana isn’t just cold. It’s unpredictable. Warm days, freezing nights, lake-effect snowstorms, sudden thaws. You can drive from Elkhart to Fort Wayne or down toward Kokomo and see three different weather patterns in the same day. Your roof feels all of that. When the surface isn’t in good condition before those swings start, problems follow.
To get ahead of winter, here are the main things to check while conditions are still manageable.
Look for standing water and ponding areas
Flat and low-slope roofs naturally hold small amounts of water, but they should never hold it for long. If you see ponding water that sits more than 48 hours after a rain or melt, that’s a sign the roof already has drainage issues.
What creates ponding?
• Settling or low spots
• Crushed insulation under high-traffic areas
• Blocked drains
• Damaged membrane
• Poor slope from the original install
In winter, ponding becomes dangerous. When that water freezes, it expands and pushes against seams, corners, and weak spots. Over time, this breaks down the roof surface. Then when it warms up just enough, it melts and slips right inside the building. Most people only notice it once it starts dripping through ceiling tiles.
If you see ponding in early winter, it’s worth getting it looked at before temperatures drop further. Fixing it now is a whole lot easier than dealing with a mid-season leak.
Inspect the membrane for cracks, splits, and soft spots
Cold weather exposes every flaw in a commercial roof membrane.
EPDM will shrink.
TPO and PVC get stiff.
Built-up roofs crack along older seams.
Every roofing material reacts differently, but they all react. When temperatures swing from freezing to mild and back again, the material expands and contracts. That constant movement makes small cracks worse.
Walk the roof and look for:
• Surface cracks
• Raised seams
• Blisters or bubbles
• Soft or spongy areas
• Exposed scrim or fibers
• Spots where the membrane has pulled back
A soft spot is one of the biggest red flags. It usually means water has already found its way underneath the membrane. Winter will accelerate that damage because moisture trapped below freezes and expands, pushing the membrane up even more.
Catching this in December can save you from a full tear-off in spring.
Check around penetrations and high-stress points
On any commercial roof in Indiana, the most vulnerable areas are the penetrations. That’s where HVAC units sit. Where pipes exit the roof. Where vents poke through. These spots take more stress than the rest of the roof because they move with wind, vibration, and temperature swings.
Look closely at:
• HVAC curbs
• Pipe boots
• Vent stacks
• Skylights
• Roof hatches
• Parapet walls
If flashing around these areas is loose or cracked, winter will make it worse. Warm air from inside the building can escape around those gaps and melt snow in small pockets. That melt refreezes at night and opens up the gap even more. Before long, the roof is taking on water every time the temperature changes.
A quick repair here can prevent months of trouble.
Look for early signs of shrinkage
EPDM shrinkage is a statewide issue, not just an Elkhart problem. We see it on buildings from South Bend to Indianapolis. Once temperatures drop, EPDM wants to pull inward. This pulls flashing away from walls and separates corners. When shrinkage starts, winter accelerates it.
The signs are:
• Wrinkles pulling toward edges
• Gaps near parapet walls
• Base flashing that looks stretched
• Tight, pulled seams
If you manage a property with an EPDM roof and you notice this happening before December, don’t ignore it. Indiana winters are long. The sooner it’s reinforced, the better.
Check the condition of past repairs
This is something most business owners overlook, but it’s one of the most important parts of winter prep. If your roof has had patches or repairs done over the past five years, check those areas first. Repairs are typically the first place winter tries to break through.
Why? Because repairs involve seams, adhesives, or welded edges. When winter hits, those areas take more stress than untouched parts of the roof.
If a past repair is peeling or cracking, it’s not going to survive a hard freeze.
Review high-traffic sections of the roof
Many commercial roofs in Indiana have sections that get walked on often. HVAC techs. Electricians. Maintenance crews. Snow removal teams. All that foot traffic compresses insulation and weakens the membrane.
If your roof serves heavy equipment or has areas where people walk to reach units, check for:
• Worn walk pads
• Dented or crushed insulation
• Tearing around equipment platforms
• Scuffs that expose underlying layers
Heavy foot traffic is one of the biggest causes of premature wear in cold weather. Once insulation is crushed, the roof develops dips. Those dips hold water. And water becomes ice. And ice becomes leaks.
What business owners often ask at this stage
Here are questions we hear from business owners in Elkhart and throughout Indiana when we walk roofs before winter:
Do I need to fix everything right now?
Not always. Some issues can wait. But problems involving seams, flashing, or ponding water should be handled before freezing weather locks everything in place.
What if snow hits before I inspect it?
You can still check the roof. Snow just makes the process slower. A light broom clears the surface enough to spot issues.
Is it safe to walk the roof in winter?
With care, yes. But ice makes it risky. That’s why the pre-winter inspection is so important.
How do I know if a problem is serious?
If water can get in or freeze inside it, it’s serious. Winter doesn’t stay gentle for long.
Why this step matters most for winter survival
A commercial roof isn’t built to fail all at once. It fails slowly. A crack here. A soft spot there. A loose corner. Winter simply makes those small issues louder. Once temperatures stay low, repairs become harder, materials don’t bond as well, and emergency service becomes the only option.
A proper surface inspection before winter:
• Stops small leaks before they grow
• Protects the structure of the building
• Helps you manage heating costs
• Prevents expensive emergency repairs
• Extends the life of the roof
• Keeps tenants, staff, and equipment protected
This is the foundation of your entire winter maintenance plan. Everything else on the checklist builds on this first step.
Clear and Test the Drainage System
If there’s one part of a flat or low-slope commercial roof that needs to be working at full strength before winter hits, it’s the drainage system. In Indiana, drainage isn’t a nice-to-have. It’s a survival tool. We don’t just get cold weather here. We get full swings in temperature that turn roofs into shallow ponds one day and frozen sheets the next.
Any roofing contractor in Elkhart, South Bend, Fort Wayne, or even down toward Indianapolis can tell you the same thing. The majority of winter leaks trace back to poor drainage. When water can’t get off the roof, it finds its own way down. And it never chooses the path you want.
Before winter settles in, every business owner should take time to inspect, clear, and test the entire drainage system from end to end. Here’s what to look for and why each piece matters.
Start with a full cleaning of every drain and gutter
This is the most basic step, but it’s also the most skipped. Even the best commercial drainage system can’t do its job if it’s clogged with leaves, sticks, roofing granules, dirt, and whatever else blows across Indiana all fall long.
Flat roofs collect debris by design. There’s nowhere else for it to go. By late November, most roofs have buildup around drains that owners haven’t seen in months. That’s why a thorough cleaning right before winter is so important.
Clear out:
• Internal roof drains
• Scupper drains
• Gutters
• Downspouts
• Overflow drains
• Secondary drainage paths
If this debris stays in place through December, water backs up, freezes, expands, and starts lifting the membrane. Once that happens, you’re looking at repairs that could have been prevented with a half-hour cleanup.
Check for slow drains, not just obvious clogs
A drain that looks open can still be partially blocked. This is one of the most common surprises we find on roofs across Indiana. A drain may let water through, but not fast enough to handle snowmelt.
Slow drains are a winter hazard because:
• Meltwater from snow hits all at once
• Temperatures drop quickly after sunsets
• Water that can’t exit fast enough becomes ice
• Ice expands inside the drain bowl or piping
• That expansion cracks seals, gaskets, or membranes
You don’t want ice forming inside your drain system. That’s one of the fastest ways to damage internal piping or create leaks inside walls.
If water pools around a drain longer than a few minutes after you pour water near it, that drain needs attention. A roofing crew can run a camera or perform a deeper inspection if needed.
Look for damage around drain bowls and attachment points
On many Indiana commercial buildings, the drain bowl is one of the oldest parts of the roof. You might have a newer membrane but a drain bowl that’s 20 years older. That’s where issues often start.
Inspect the area around each drain for:
• Cracks in the membrane near the bowl
• Loose rings or clamps
• Gaps where the membrane should be sealed tight
• Rust on metal parts
• Soft spots around the drain area
If the membrane has pulled back from the bowl, even just a little, water will start slipping underneath during freeze-thaw cycles. The problem grows quickly and often pops up as interior ceiling leaks far from the actual drain.
Many business owners assume a ceiling leak is in the middle of the roof. But more often than not, it’s coming from a drain failure several feet away.
Examine scuppers and edge drainage systems
Not every commercial roof uses internal drains. Many buildings around Elkhart and throughout Indiana rely on scuppers. These are openings cut into the parapet wall that allow water to drain off the roof into a downspout.
Scuppers work well, but only when they’re kept clear.
Look for:
• Leaves packed inside the opening
• Birds’ nests
• Ice forming in or around the scupper box
• Rusted metal
• Caulking that has cracked or separated
• Membrane pulling away from the scupper throat
If a scupper freezes shut, water has nowhere to go. It backs up onto the roof. It fills low areas. And it presses against flashing and seams until something breaks. In deep winter, the pressure from backed-up ice can actually push water inside your building.
This is one of the most common winter roofing failures in the Midwest.
A clean scupper can be the difference between a dry building and a disaster.
Don’t forget secondary or emergency drainage
Most commercial roofs have secondary drainage systems built into them. These are typically higher than the primary drains or scuppers and only activate when the main system is overwhelmed.
In winter, secondary drains become critical — especially during sudden thaws.
Indiana gets several warm-ups every winter that melt large amounts of snow very quickly. When all that meltwater hits the roof at once, primary drains can’t always keep up. That’s when secondary drains step in.
Check them for:
• Proper height
• Blockages
• Membrane adhesion
• Damage from snow removal equipment
• Visible signs that water has backed up in the past
If secondary drains are clogged or damaged, the roof has no backup plan. That puts the building at real risk.
Make sure gutters and downspouts can handle snowmelt
Not every commercial roof in Indiana uses gutters, but many smaller buildings do. Warehouse-style structures, retail strips, and metal commercial buildings often rely on large gutter systems to move water away from the roof edge.
Winter puts extra stress on those gutters because:
• Snow adds weight
• Ice expands inside the gutter
• Downspouts freeze solid
• The added weight pulls gutters away from the fascia
If the gutter pulls loose even a little, water can run behind it and damage the wall structure. For a commercial building, that can mean wet insulation, mold, or interior water stains that take months to repair.
Check for:
• Loose gutter brackets
• Sagging sections
• Visible ice buildup
• Blocked downspouts
• Rusted seams
If a gutter system looks strained before winter, it’s not going to improve as temperatures fall.
Test the entire system with controlled water flow
This step is rarely done by property owners, but it’s incredibly useful. Pouring water near drains or scuppers lets you see how fast the system moves water. It also reveals slow spots that aren’t obvious by visual inspection alone.
A good test will show you:
• Whether water flows directly toward drainage points
• Whether it detours or gets stuck
• Whether drains handle the volume
• Whether water disappears at the right speed
If drains take too long to clear water during a test, they will absolutely struggle during snowmelt.
Why drainage issues get worse across Indiana during winter
Indiana winters are unique because of the freeze-thaw pattern. It’s not just one long freeze. We get multiple cycles in a single week. That rapid temperature swing is what destroys drainage systems.
Here’s what happens:
Water pools because of a clog or slow drain
It freezes overnight
Ice expands, pushing on the membrane
The membrane lifts
Next warm-up sends water under the membrane
It freezes again that night
The ice pushes further and breaks the bond
Repeat until you have a leak
This cycle is harsh on every roof, no matter how new it is.
Roofs in Elkhart, Goshen, Mishawaka, South Bend, and the whole northern half of the state see this pattern from December to March. That’s why drainage prep is so important.
When to call a contractor instead of handling it yourself
Most business owners can safely clear debris near drains. But some drainage problems need professional help.
Call a commercial roofing contractor if:
• Drains are backed up deep inside the piping
• Water isn’t moving even after cleaning
• The membrane is damaged near the drain
• Scuppers are cracked or separating
• Gutters are pulling away from the building
• The roof has ponding water that doesn’t drain after 48 hours
Winter roofing work is difficult without the right tools. It’s better to handle these issues while the weather is still workable.
The bottom line for Indiana businesses
No part of your commercial roof works harder in winter than the drainage system. If it’s clogged, slow, or damaged, the roof simply can’t do its job. Flooding, leaks, ice buildup, membrane damage, and structural pressure all trace back to poor drainage.
Taking a little time now to clear and test the system saves enormous trouble during December, January, and February. It also reduces emergency repair calls, which are always more expensive in winter.
This is one of the most important steps in your winter maintenance plan — maybe the most important.
Inspect All Flashings, Edges, and Perimeter Details
Even the strongest commercial roof in Indiana depends on the quality of its flashings and perimeter details. These are the parts of the roof that tie everything together. They seal off the edges, protect transitions, and hold the membrane tight against walls and equipment. If anything fails during winter, it’s usually here.
What most business owners don’t realize is that flashings take more stress than any other part of the roof. Wind pulls at them. Snow pushes against them. Ice builds up next to them. Heating systems inside the building create warm pockets behind them. And Indiana’s freeze-thaw cycle forces these areas to expand and contract constantly.
You can have a roof that looks perfect from 20 feet away, but if the edges aren’t sealed right or the flashing is loose, winter will find a way in. Before temperatures drop across Elkhart and the rest of the state, take the time to inspect every linear foot of flashing and perimeter detail. Here’s how to do it the right way.
Start with the parapet walls and roof edges
Parapet walls are one of the most common failure points on flat commercial roofs. They stand above the roof line, catch wind, trap blowing snow, and hold ice along the edges. When snow drifts pile up on parapets — which is extremely common in Northern Indiana — the added weight and pressure expose any weak spots in the flashing.
Walk the entire perimeter and check for:
• Areas where the membrane has pulled away
• Cracks or splits in the termination bar
• Caulking that’s dried out or peeling
• Blisters near the wall base
• Exposed fasteners
• Gaps in the metal coping
Pay close attention to corners. Corners take the most movement during winter because wind hits them from multiple angles and snow tends to settle against them. If the membrane is even slightly loose here, water will find its way in as soon as ice begins to shift.
Examine metal coping and edge metal for movement
Flat roofs often have metal coping installed on top of parapet walls. This metal protects the wall and gives the roof a clean, finished look. But coping also expands and contracts with temperature changes. When cold snaps hit Indiana in December and January, coping can shift, loosen, or pull up on one side.
Look for:
• Lifted seams
• Loose fasteners
• Gaps between sections
• Rusted screws
• Warping or bowed sections of coping
• Membrane pulling away from the base of the wall below the coping
If coping isn’t sealed tight, snowmelt will drip behind it instead of running off the roof. This leads to hidden moisture inside the wall structure, which can go unnoticed for months until interior damage appears.
Edge metal on roofs without parapets should be inspected the same way. Any area where metal meets membrane is a stress point during winter.
Check base flashings for signs of movement or cracking
Base flashing is the section of membrane that runs up the wall from the roof surface. It’s designed to flex with temperature changes, but winter in Indiana pushes it to its limits. When temperatures swing from mild to freezing, the base flashing takes the brunt of that expansion.
Look for early signs of failure:
• Shrinkage pulling the membrane down from the wall
• Cracks at the transition point
• Seams lifting at the top or bottom
• Wrinkles creating open pockets
• Areas that feel soft underfoot
Base flashing should always lie smooth and tight. If it pulls away even an inch, water will collect behind it, freeze, expand, and open the gap wider. This is how slow, steady damage builds up all winter long.
Inspect termination bars and counterflashings
Termination bars (or T-bars) secure the top edge of the membrane where it meets a wall or vertical surface. Counterflashings are the metal covers that protect that area from direct exposure.
Both pieces have to hold firm through Indiana’s coldest months. If they’re loose, even slightly, winter will expose that weakness.
Check for:
• Gaps between the T-bar and wall
• Loose screws or missing fasteners
• Cracked sealant running above the bar
• Metal counterflashing that’s pulled up
• Rust or corrosion around fasteners
It only takes one loose fastener to create an opening that grows worse with every freeze-thaw cycle.
Look closely at corners, transitions, and rooftop junctions
Every time a roof surface changes direction, height, or angle, there’s a transition. These areas take more stress than flat, open sections of the roof.
Check:
• Inside and outside corners
• Wall transitions
• Steps or elevation changes
• Seams connecting two roofing systems
• Patchwork from previous repairs
• Areas where two materials meet, such as TPO connecting to metal
Corners and transitions suffer the most movement during winter. Wind hits them first. Ice forms against them. Snow melts unevenly around them. If there’s even a small gap, water will work its way inside.
These spots should be reinforced and sealed tight before winter. If they’re not, they’re the first places winter will expose.
Look for signs of wind uplift along the edges
Indiana gets strong wind events throughout winter, especially across the northern counties. Lake-effect systems bring gusts that push up against roof edges and try to lift the membrane. If the perimeter isn’t properly secured, those gusts can create pockets where the membrane rises and falls like a drum.
This movement isn’t always obvious from the ground, but on the roof you’ll see:
• Raised edges
• Bubbles or blisters along the perimeter
• Wrinkled membrane moving back toward the center of the roof
• Fasteners pulling loose from the substrate
If the membrane can flap even a little, wind will make it worse. Over time, this leads to edge failure, interior leaks, or complete sections lifting during storms.
Check the condition of wall caps, sleepers, and equipment curbs
These details often get overlooked, but they’re critical for winter survival. Wall caps and equipment curbs must maintain a tight bond between the roof and the upright structure. When snow slides or melts around these areas, water concentrates at the base.
Inspect for:
• Torn membrane where sleepers meet the roof
• Cracked sealant around curbs
• Seams lifting from vibration or wind
• Rust on metal surfaces
• Areas where insulation has pulled away
Curb flashings take a beating during winter because they sit in the middle of the roof. Meltwater flows toward them, freezes around them, and eventually works its way into any weak spot.
Watch for thermal shock damage around flashings
Thermal shock is a major issue across Indiana. A roof can go from twenty degrees at night to forty-five degrees during the day. That’s a huge swing for a roofing system. Most business owners don’t think about how violently the roof expands during those warm-ups and contracts during the freeze.
Flashings take the brunt of this movement.
Signs of thermal shock:
• Cracking around fasteners
• Stress marks where membrane bends
• Separation between membrane and metal edges
• Sudden splits that weren’t there weeks earlier
These issues get worse all winter long if left unaddressed. Once thermal shock damage starts, it rarely stops on its own.
Check any areas that have been repaired in the past
Any repair — even a good one — is still a weak point compared to the original membrane. And winter always tests those weak points first.
Look at:
• Patches
• Reinforced corners
• Welded seams
• Sections where flashing was replaced
• Areas that were resealed
If the repair looks firm and smooth, great. If it looks cracked, raised, or pulled, winter will make it worse.
Why flashings matter so much for Indiana roofs
Flat roofs don’t usually fail in big open areas. They fail where the roof connects to something else. Walls. Edges. Pipes. Curbs. Windows. Skylights. HVAC units. Drains. Parapet walls. These transition points create weak spots that slowly open during winter.
Once flashing fails:
• Water gets behind the membrane
• Insulation absorbs moisture
• Ice forms under the surface
• The membrane lifts
• Seams split
• Interior leaks appear weeks or months later
A flashing failure rarely shows itself right away. Often, the damage begins in December and doesn’t show up inside the building until February or March. By then, the roof has been taking on water for weeks.
That’s why a deep flashing inspection before winter is so important.
The bottom line for Indiana business owners
Your commercial roof can be brand new and still fail if the flashings are not sealed tight. That’s how critical these areas are during winter.
Inspecting all perimeter details before the first freeze:
• Prevents water from getting behind the membrane
• Stops winter wind from lifting the roof edges
• Protects the insulation beneath the surface
• Reduces the risk of interior damage
• Helps the roof last longer
• Saves thousands in emergency repairs
When flashings fail, the roof isn’t far behind. Taking time to inspect and repair these areas now helps the entire roof survive the long Indiana winter.
Protect Roof Equipment, HVAC Units, and Penetrations Before the Freeze
If you ask any commercial roofer what causes the most winter leaks after drainage and flashing issues, the answer is almost always the same: rooftop equipment. Every pipe, vent, HVAC unit, exhaust fan, and electrical penetration is a point where water, wind, and ice try to break through. These spots move differently than the rest of the roof. They vibrate, heat up, cool down, and expand at different rates.
Across Indiana — from Elkhart and Mishawaka to Fort Wayne, Indianapolis, and up into the colder lake-effect zones — penetrations are one of the top sources of slow, steady winter damage. Even brand-new roofs can struggle around equipment if those details aren’t inspected and reinforced before the cold hits.
Winter makes all these weak spots worse. When temperatures drop, the roof contracts. When your HVAC units kick on, the area around them warms up. That warm air melts snow, which then refreezes overnight. This constant freeze-thaw movement creates a cycle that pushes and pulls at the flashing and seals around every penetration on the roof.
Here’s how to make sure all rooftop equipment is ready for an Indiana winter.
Start with a full check of HVAC curbs
HVAC units are some of the heaviest and most disruptive structures on a commercial roof. They sit on curbs, which create a raised frame for the unit. If the flashing around those curbs isn’t tight, water will slip underneath during winter.
Inspect:
• All four sides of each curb
• Seams where the membrane meets the vertical surface
• Old patches or repairs
• Caulking around the perimeter
• Metal flashing that may be loose
• Soft spots along the base
A curb flashing should sit clean and tight against the unit. If it’s bubbling, cracking, or pulling away, consider that a high-risk leak point.
One of the most common winter failures we see is a small gap at the back side of a curb. Snow drifts push up against the unit, melt from the heat it gives off, then refreeze at night. That cycle expands any opening until water makes its way in.
Check pipe boots and vent seals
Any pipe that exits a commercial roof needs a rubber or metal boot around it. These boots age faster than most people realize. Sunlight, heat, and temperature swings all take a toll. By late fall, a lot of boots we see in Indiana have tiny cracks that go unnoticed until the first thaw.
Look for:
• Cracked rubber
• Boots that have pulled away from the pipe
• Loose clamps
• Sealant that’s dried and split
• Gaps where the boot meets the membrane
Pipe boots are small, but the damage they cause isn’t. A single cracked boot can lead to a leak that travels ten or twenty feet before showing up inside the building. That’s why these penetrations need a thorough check before winter sets in.
Inspect all vents, stacks, and rooftop exhaust fans
Commercial buildings often have multiple ventilation points across the roof. Kitchens, warehouses, manufacturing facilities, schools, and churches all rely on rooftop vents.
These vents expand when warm air moves through them, then contract quickly when temperatures drop. That movement stresses the flashing and sealant around each base.
Check:
• The flashing where the vent meets the roof
• Metal skirts or collars
• Welded seams
• Old patches
• Soft or spongy areas at the base
If a vent is leaning or sitting at an angle, that’s a sign the flashing is already failing and needs reinforcement before winter.
Look around electrical penetrations and conduit lines
Electrical lines that run through the roof require small penetrations sealed with flashing or sealant. These are some of the most frequently overlooked areas on commercial roofs.
Look for:
• Cracked or old sealant
• Loose conduit supports
• Exposed cables
• Splits where the membrane meets the penetration
• Water staining around the area
Because electrical penetrations are often grouped together, water can collect in the area if even one small seal fails.
Examine skylights and access hatches
Skylights and roof hatches are useful, but they’re also notorious leak sources in winter. The joints where skylights meet the roof take a lot of stress, especially when melting snow runs toward the base.
Inspect:
• The skylight frame for cracks
• Sealant along the frame edges
• Membrane flashing at the base
• Screws that may have pulled loose
• Condensation buildup on the inside
If the seal around a skylight or hatch is weak, it won’t last long through Indiana’s freeze-thaw cycles.
Check for vibration damage around mechanical units
HVAC units vibrate. Exhaust fans vibrate. Kitchen hoods vibrate. Even small rooftop machines can cause constant micro-movement that weakens the flashing and membrane around them.
Signs of vibration damage:
• Wavy or rippled flashing
• Cracks near the corners of a curb
• Patches that have lifted slightly
• Small circles of membrane wear directly in front of vibration points
The more the unit runs in winter, the worse the damage becomes. Cold air makes the membrane stiffer and less able to flex with vibration. That’s why winter exposes vibration failures quickly.
Assess snow load pressures around equipment
Indiana gets drifting snow, especially in the northern counties. Rooftop equipment creates barriers that catch and hold heavy snow. When snow piles up around units, the weight pushes down on the flashing and forces water into seams during melt cycles.
Check:
• Areas where snow naturally collects
• Low spots around equipment
• Corners where snow tends to drift
• Places where ice builds up after warm-up days
If your roof has multiple HVAC units, these snow pockets can create serious stress on both the roof surface and the flashings holding everything together.
Ensure walk pads are in good condition
Most service providers walk the same paths to reach HVAC units. Over time, that foot traffic compresses insulation and wears down the membrane.
Inspect walk pads for:
• Cracks
• Tears
• Loose sections
• Missing pads
• Areas where the membrane is exposed outside the pad zone
If the walk pads are worn down, winter will make it worse. A stretched or torn pad becomes a weak spot that collects water and ice.
Double-check all previous repairs around equipment
Like other areas of the roof, repairs near rooftop equipment don’t always age as well as the original installation. These should be checked before the cold sets in.
Look for:
• Lifted patches
• Seams that didn’t bond fully
• Cracking around edges
• Sealant pulling away
Repairs near equipment take more stress than anywhere else. Winter magnifies that stress tenfold.
Why equipment and penetrations matter so much in Indiana winters
Every penetration creates a slice in the membrane. Even when sealed properly, that slice is a weak point. Winters in Indiana are tough on these areas because of:
• Freeze-thaw cycles
• Heat escaping the building
• Equipment vibration
• Snow drifts
• Temperature swings from day to night
• Rapid snowmelt around warm equipment
When warm air from the HVAC unit melts snow into water, it often refreezes that night. This pattern wears down flashings quickly and creates gaps before anyone notices.
Once a failure forms around a penetration, the roof begins to take on water. That water travels through insulation, moves across structural decking, and eventually finds a path into the building interior.
This is why leaks from equipment rarely show up directly below the unit. Water will often travel 10 to 30 feet before dripping inside.
The bottom line for business owners
Rooftop equipment plays a major role in winter roof performance. Even small gaps around pipes or vents can turn into major problems once temperatures drop. Taking time in late fall and early winter to inspect every unit, boot, curb, and penetration will:
• Prevent slow winter leaks
• Reduce emergency repair calls
• Protect insulation and the roof structure
• Extend the lifespan of the roof
• Save money on heating costs
• Keep your building dry and safe
A commercial roof isn’t just a flat surface. It’s a system full of moving parts. Winter puts pressure on every one of them. Inspecting and reinforcing these areas before deep winter hits is one of the smartest investments any Indiana business owner can make.
Remove Debris and Keep High-Risk Areas Clean All Winter
A clean commercial roof isn’t just about appearance. It’s about survival, especially during winter in Indiana. The way debris collects on flat and low-slope roofs across the state plays a major role in how well a roof manages snow, ice, and meltwater.
Every year, before the first heavy snow, we climb onto roofs in Elkhart, Goshen, South Bend, and all across Northern and Central Indiana and find the same thing: piles of leaves, windblown trash, twigs, asphalt granules, dirt, and debris packed around drains, scuppers, HVAC units, and parapet walls.
On a warm fall day, that debris doesn’t look like a big issue. But once winter hits, it becomes one of the biggest threats to the roof system.
Debris holds water. It freezes solid. It blocks drainage paths. It creates ice dams. It traps melting snow. It hides small cracks and prevents sunlight from warming the membrane. It becomes a problem multiplier.
This is why every commercial roof in Indiana needs a full debris removal before winter and several light cleanings throughout the season. Here’s what to look for and why it matters.
Start with the areas where debris naturally collects
Every roof has “catch zones.” These are areas where wind, gravity, and building layout work together to push leaves, trash, and small branches into one place.
Common catch zones include:
• Around internal drains
• Inside and behind parapet walls
• Corners of the roof
• Areas downhill from HVAC units
• Behind rooftop equipment
• In front of scuppers and overflow drains
• Under ladder access points
• Along roof edges where wind swirls
In Indiana, fall winds pull debris across roofs constantly. By late November, many buildings have enough debris to cause real trouble once it snows.
Even small piles create a barrier that traps water and holds ice. That trapped moisture adds weight and encourages freeze-thaw damage.
Remove all leaves and organic debris before the first freeze
Leaves are one of the most damaging forms of debris on a commercial roof during winter. Wet leaves mat down into thick layers that block drains, hold moisture, and create ice sheets.
If you have mature trees anywhere near the building — even across a parking lot — wind will carry leaves onto the roof. We see heavy leaf buildup even on buildings with no trees on the property.
Once leaves freeze together:
• They create heavy ice mats
• Water cannot flow underneath them
• Heat from the building melts small pockets that then refreeze
• The freeze-thaw cycle pulls at seams and flashings
Removing leaves before the first freeze is one of the easiest and most effective winter prep steps a business owner can take.
Clear away debris from drains, scuppers, gutters, and downspouts
Even if the drains themselves are clean, debris around them can still block water from getting to the drain. Snowmelt flows toward drains slowly, and even small obstructions cause backups.
Check and clear:
• Drain bowls
• Strainer domes
• Scupper openings
• Gutter mouths
• Downspout inlets
• Overflow drains
If debris is allowed to accumulate during winter, it will freeze solid against these openings, turning them into ice dams. Once that happens, water spreads across the entire roof instead of draining properly.
This is often the reason roofs in Northern Indiana develop ponding water in late winter.
Remove trash, packaging, and loose materials left by other contractors
Commercial roofs are busy places. HVAC contractors, electricians, plumbers, and maintenance crews often leave behind small scraps — zip ties, pieces of metal, bits of insulation, screws, packaging, taped plastic, and other loose materials.
These objects may seem harmless, but they become real hazards when winter arrives.
Loose trash can:
• Blow into drains
• Get buried under snow
• Tear the membrane as it moves
• Freeze into the surface
• Scratch or puncture the roof during strong winds
We see this all the time on Indiana roofs: a simple screw or metal scrap ends up lodged into the membrane after shifting under snow.
A quick cleanup prevents that from happening.
Check low-traffic areas (they often have the worst debris)
The edges and corners of a roof that people rarely walk near often collect the most debris. Snow hides this buildup until late winter when it melts and exposes a soaked, frozen mass of leaves and trash.
These areas tend to be:
• Far from equipment
• Behind parapet walls
• In upper or lower roof sections connected by steps
• Along long roof edges where wind swirls
Because no one checks these spaces in December and January, problems go unnoticed until leaks start to appear indoors.
Keep rooftop equipment pads free of snow-packed debris
HVAC units and other mechanical systems create wind shadows that trap debris against their bases. When snow piles up in these areas, that buried debris holds moisture directly against the flashing and curb.
This is one of the biggest causes of curb flashing failure in winter.
Look for and remove:
• Leaves
• Paper or cardboard
• Small plastic pieces
• Tree seeds and needles
• Dust and soil buildup
If debris collects here, it creates:
• Ice dams around the unit
• Leaks during melt cycles
• Stress on flashings
• Movement of water toward the interior of the roof instead of away
Removing debris around equipment is one of the most overlooked winter maintenance tasks — but also one of the most important.
Inspect roof edges for debris buildup caused by strong winds
Indiana winds, especially in Northern counties, slam against buildings and force debris toward the edges of a roof. This debris often gets trapped between edge metal and snow banks.
Once debris freezes in place:
• Water cannot drain properly
• Icicles form in dangerous locations
• Edge flashings are put under extra stress
• Meltwater is forced back toward the interior of the roof
Snow hides all of this. That’s why early-season cleaning and mid-winter check-ins are so important.
Clear debris from roof steps, elevation changes, and multi-level sections
Many commercial buildings in Indiana have multiple roof levels. Snow drifts and wind push debris into the lower levels where it gets buried.
Lower sections of multi-level roofs are high-risk areas during winter because:
• Snow collects heavily
• Debris gets trapped under that snow
• The weight puts stress on the membrane
• Meltwater flows unevenly
• Ice builds up against walls and transitions
These lower levels need to be checked more often than other areas.
Understand how debris traps moisture and accelerates winter damage
Debris doesn’t just sit on top of the roof. It changes the way the entire roof system handles moisture.
Here’s what happens:
Snow falls and covers the debris
The building heats up and melts snow from underneath
Meltwater becomes trapped in the debris layer
The water refreezes overnight
Ice expands and pushes into seams or flashing
This cycle repeats and opens small gaps wider each time
By late winter, what started as a handful of leaves can turn into a serious leak.
Why keeping the roof clear matters so much for Indiana businesses
Winter in Indiana is unpredictable. Snow might melt one day, refreeze the next, then melt again the following afternoon. Debris forces that meltwater to behave unpredictably too. Instead of flowing freely to the drains, it gets trapped and redirected into weak points.
Keeping the roof surface clean all winter:
• Prevents ice dams
• Helps drains work properly
• Reduces freeze-thaw stress
• Extends the life of the membrane
• Makes snow removal safer
• Helps warm air escape evenly
• Stops small problems from turning into structural damage
It also makes spring inspections easier and more accurate.
A clean roof is a healthy roof. In winter, it’s a protected roof.
Manage Snow and Ice the Right Way (Without Damaging the Roof)
Snow and ice are part of life in Indiana. Every winter brings a mix of lake-effect snowstorms, freezing rain, sleet, sudden warm-ups, and cold snaps that hit flat commercial roofs harder than most business owners realize. The way you handle snow and ice on your roof can determine whether the building stays dry all winter or ends up with leaks, structural stress, and unexpected repair bills.
Most winter roof failures aren’t caused by the snow itself. They’re caused by how the snow interacts with the roof. Snow that melts unevenly. Ice that forms in the wrong place. Heavy drifts that push on flashings. Meltwater that backs up behind piles. Crews using the wrong tools to remove snow. Or no one checking critical areas until late winter.
Managing snow and ice correctly is one of the most important winter maintenance tasks for any commercial building in Elkhart or anywhere across the state. Here’s what business owners need to know.
Understand how snow behaves on a flat commercial roof
Snow doesn’t settle evenly. Even on a perfectly built flat roof, snow moves around all winter. Indiana’s winter wind patterns play a huge role in how snow stacks up.
Across the state, snow tends to:
• Drift against parapet walls
• Build up around HVAC units
• Pile against skylights and hatches
• Collect in roof corners
• Form long ridges where wind channels across large surfaces
• Melt faster near warm equipment
• Slide into low spots during warm-ups
Every building has its own snow “personality.” Tall buildings nearby, tree lines, open parking lots, and wind tunnels all affect how snow shifts. When you understand where snow naturally piles up, you can better predict which areas of the roof are at risk each winter.
Know the signs of dangerous snow loads
Indiana has seen winters where snow sits on roofs for weeks without melting. Even lightweight snow eventually becomes dense as it settles. Heavy, wet snow adds even more weight.
The general rule:
Snow is lighter when it first falls, but it gets heavier each day it stays on the roof.
Signs of a dangerous snow load include:
• Sagging in the roof deck when viewed from inside
• Doors inside the building that start sticking
• Cracking noises from the deck or rafters
• Water suddenly appearing at interior joints
• Bowing of beams or ceiling tiles
If any of these signs show up during a heavy snow stretch, the roof needs immediate attention.
Indiana building codes are designed to handle significant loads, but older buildings or neglected roofs are more vulnerable.
Remove snow early — but only when it’s truly needed
Not every roof needs snow removed every time it snows. In fact, clearing snow too often can cause more damage than leaving it in place. But when snow is deep or drifting heavily, removal becomes important.
Here’s the right approach:
• Light, fluffy snow under six inches usually isn’t an issue
• Wet, heavy snow over six inches should be evaluated
• Deep drifts, even if the rest of the roof is clear, need attention
• Any buildup around critical areas — drains, scuppers, HVAC curbs — must be removed
Flat roofs can handle predictable snow loads, but uneven weight distribution is what causes trouble. A two-foot drift on one side of a roof can put more stress on that area than even snow coverage across the whole roof.
If you’re unsure whether removal is needed, a professional inspection is the safest path.
Use the right tools for snow removal
This is where many roofs get damaged. Snow removal crews without commercial roof experience often use tools that gouge, slice, or tear the membrane.
Never allow the following on your roof:
• Metal shovels
• Ice chisels
• Picks
• Sharp snow pushers
These tools can cause damage that doesn’t show up until spring when the roof begins leaking.
Instead, use:
• Plastic shovels
• Hard-edge snow pushers designed for flat roofs
• Soft brooms
• Lightweight roof rakes
Snow should be pushed gently, not chopped. Leave a thin layer of snow on the roof surface instead of scraping all the way down to the membrane. That small layer protects the roof.
Clear snow away from drains, scuppers, and gutters first
Your roof doesn’t need to be spotless. It needs to be able to drain. That’s the difference between safe and unsafe winter conditions.
Any snow blocking drainage paths should be removed before anything else.
Focus on:
• Internal drains
• Scuppers
• Overflow drains
• Gutters
• Downspouts
• Low spots that channel to drains
If these areas are buried, water from warm-up days will have nowhere to go. Instead of draining off the roof, it will back up, freeze into thick ice, and start pushing against seams and flashings.
This is one of the leading causes of winter leaks across Northern Indiana.
Be careful around equipment and penetrations
Clearing snow too aggressively around HVAC units, pipes, vents, skylights, and hatches can damage flashing and create new leak points. These areas require gentle handling.
When clearing snow around equipment:
• Use small, controlled movements
• Remove snow in layers, not all at once
• Don’t push snow toward the base of the unit
• Keep at least a few inches of space between the shovel and flashing
• Avoid letting drifts build above curb height
Snow that melts around warm equipment often refreezes and forms ponds. Keeping these areas clear prevents ponding and protects the flashing from freeze-thaw damage.
Don’t let snow pile against parapet walls
Parapet walls usually take the heaviest drifts. This snow puts pressure on the membrane and flashing at the base of the wall. The snow also melts and refreezes in cycles that create ice wedges pushing into the flashing.
This is why many winter leaks appear along the top edges of commercial buildings.
Clear snow from:
• The base of parapet walls
• Inside corners where two walls meet
• Areas where drifting creates deep piles
Leaving deep snow in these locations can cause long-term flashing damage.
Watch for ice dams — they form faster on commercial roofs than you think
Ice dams aren’t only a residential problem. They happen on flat commercial roofs too, especially during freeze-thaw cycles.
An ice dam forms when:
Snow melts from building heat or sun
Meltwater flows toward a drain or edge
The temperature drops
The water refreezes before draining
The ice builds up and blocks water flow
Once the dam forms, additional meltwater backs up behind it. That water can rise several inches and push into seams, flashings, and any weak spots.
Ice dams are common:
• Around drains
• In front of scuppers
• Along parapet walls
• At elevation changes
• Near equipment curbs
Removing small ice buildups early prevents major drain backups later.
Never use salt, chemicals, or de-icers on a commercial roof
This is a common mistake. Many business owners assume they can treat a flat commercial roof the same way they would treat a sidewalk or parking lot. But salt and chemical deicers destroy roofing membranes.
They can:
• Eat through protective layers
• Break down adhesives
• Damage seams
• Corrode metal parts
• Accelerate aging when mixed with meltwater
• Leave residue that prevents future repairs from bonding
Even when used sparingly, these products cause long-term damage that far outweighs any temporary melting benefit.
If ice must be removed, mechanical removal with safe tools is the only option.
Know when to bring in a professional snow removal team
Some snow events are too big, too heavy, or too risky for untrained staff to handle. Indiana has winters where deep snowfalls or long cold stretches make roof access dangerous.
Call a roofing professional or commercial snow-removal team if:
• There are deep drifts near walls or equipment
• Snow depth varies across the roof
• The building shows signs of stress
• A storm brings heavy, wet snow
• Ice dams have already formed
• Meltwater is backing up into the building
• The roof has a history of drainage issues
• You’re unsure where the membrane is under a snowpack
Professional crews understand membrane systems, roofing materials, safety protocols, and how to remove snow without causing damage. It’s an investment that protects the roof through the harshest parts of winter.
Why proper snow and ice management matters so much for Indiana roofs
Indiana winters don’t deliver one type of weather. They deliver everything. A roof may be under six inches of snow one day, drained and dry the next, then coated in ice two days later. Those swings put pressure on every inch of your commercial roof.
Managing snow and ice correctly:
• Prevents ponding water
• Protects flashings and seams
• Reduces the risk of leaks
• Keeps drainage paths open
• Minimizes structural stress
• Protects membrane lifespan
• Reduces emergency calls
• Helps insulation stay dry and effective
Every winter roofing statistic points to the same truth: roofs don’t fail because of snow. They fail because snow and ice weren’t managed properly.
Schedule a Winter Roof Check-Up
Most business owners understand the importance of a roof inspection. It’s the right time of year to get ahead of winter problems. But what surprises a lot of property managers across Indiana is how much can change between December and March. Winter doesn’t freeze the roof in one condition for the whole season. It keeps reshaping it.
One inspection isn’t enough for a commercial roof in a state that sees everything from lake-effect snow in the north to heavy sleet in the central counties to freeze-thaw swings that can roll across the whole region in a single day.
A mid-winter inspection is just as important as the early-winter prep. Sometimes it’s even more important, because it tells you what winter has already done to the roof — and what it’s about to do if nothing changes.
Here’s why every commercial building in Elkhart, Goshen, Mishawaka, South Bend, and the surrounding Indiana counties should get a mid-winter checkup.
Winter changes the roof surface every week
A roof in Indiana goes through multiple stress cycles each week during winter. Snow lands. Snow melts. Water refreezes. Temperatures rise. Wind picks up. Ice shifts. Equipment vibrates. Water backs up. The roof expands. The roof contracts.
By mid-January, the roof may be dealing with:
• Small cracks that weren’t there in December
• Patches that lifted after repeated freezes
• Drains that clogged with ice or debris
• Flashings that pulled loose from the wall
• New ponding areas created by compressed insulation
• Ice dams forming behind drift lines
• Meltwater creeping into weak spots
• Shrinkage in EPDM membranes
• Scuppers freezing shut
• Snow drifting into new patterns
These conditions don’t show up during a fall inspection. They only appear after winter starts doing its work.
A mid-winter inspection gives you eyes on the roof when the roof is under the most stress.
Freeze-thaw movement exposes new problems all winter
Indiana’s winter temperature swings are extreme. A roof can go from ten degrees at sunrise to forty degrees by lunch. That may feel normal for us, but a roof reacts violently to those shifts.
What you see in December may not be what you see in February.
Freeze-thaw cycles create:
• Fresh cracks
• New gaps at seams
• Flashing separation
• Fastener movement
• Curling around edges
• Shrinkage at parapet walls
• Punctures buried under snow
• Insulation settling
A mid-winter inspection finds these issues before they become spring leaks.
Storms can reshape the entire roof environment
Even on a well-built roof, a single storm can change conditions overnight. A snow event in Elkhart can pile twenty inches of wet snow on one side of a roof while leaving the other side almost bare. A wind event in South Bend can push debris into drains that were completely clear the week before. A cold rain in Fort Wayne can freeze solid across the roof and lock meltwater in place.
Storm-driven changes include:
• Drifts forming in new areas
• Debris blowing into drains
• Ice forming a barrier around parapets
• Meltwater redirecting to low spots
• Snow collapsing previous pathways
• HVAC runoff freezing into large sheets
These changes aren’t predictable. A mid-winter inspection helps you respond to the weather your roof actually experienced, not the weather you expected.
Winter repairs are easier when caught early
Some repairs simply can’t be done in deep winter if the damage becomes too severe. Membranes bond differently in cold temperatures. Adhesives cure slower. Some materials lose flexibility. And heavy snow makes certain areas unsafe to access.
Early detection matters because minor issues can still be addressed mid-season.
A mid-winter inspection allows:
• Light flashing repairs
• Drain clearing
• Patch reinforcement
• Sealing of early cracks
• Removal of ice dams
• Clearing of clogged scuppers
• Walk pad replacements
• Preventative maintenance around equipment
Letting a problem sit until spring often means the repair becomes bigger, more expensive, and more disruptive.
Snow and ice hide problems you won’t see in spring
A lot of business owners wait until spring for an inspection, but many winter failures start months earlier under snow. You won’t see them once everything melts — you’ll only see the damage they caused.
Common problems hidden under snow include:
• Water trapped behind ice dams
• Cracks forming where ice shifted
• Flashing that lifted under snow drifts
• Punctures from buried debris
• Curb flashing separating from HVAC units
• Soaked insulation under ponding areas
• Slow leaks traveling inside the roof system
By the time spring reveals these issues, the damage is already done.
A mid-winter checkup catches them before they escalate.
Indiana winters are long — the roof needs support during the season, not after
In our state, winter is a four-month event. Sometimes five. By late January, most roofs have already endured dozens of freeze-thaw cycles. By mid-February, insulation may be stressed. By early March, heavy meltwater events are coming.
A mid-winter inspection isn’t “extra.” It’s necessary.
It helps you:
• Prevent costly emergencies
• Avoid business downtime
• Extend the lifespan of the roof
• Reduce interior leaks
• Improve drainage
• Protect flashing
• Preserve insulation
• Maintain your warranty
Manufacturers like regular inspections. Insurance companies appreciate them. And building owners benefit from them financially.
Your roof maintenance should be a year-round plan, not a one-time event
Most commercial property owners didn’t realize how important maintenance was until they went through their first winter leak. Roofs don’t need over-the-top attention, but they do need consistency — especially in a climate like Indiana.
A good maintenance plan includes:
• A fall inspection before winter
• A mid-winter inspection during peak freeze-thaw
• A spring inspection after snowmelt
• Consistent debris cleaning
• Smart repair scheduling
• Documentation of roof condition
That’s exactly why American Builders created its Commercial Roof Maintenance Plan.
This is where American Builders makes winter simple and predictable…
Staying ahead of winter roof trouble doesn’t have to drain your time, budget, or attention. The whole point of a professional maintenance plan is to make winter predictable — without relying on guesswork or hoping the roof holds up through storms.
American Builders handles everything you need to keep your roof strong all year.
Here’s how our plan works:
1. Regular Inspections
We inspect your commercial roof twice a year — usually spring and fall (right before winter kicks in) — and add additional checkups whenever needed. We catch early signs of damage, especially at edges, flashings, vents, and anywhere water can sneak in.
2. Cleaning and Debris Removal
We clear the roof, drains, gutters, and scuppers. This prevents backup, ice dams, and winter ponding that can destroy a roofing system.
3. Surface Maintenance
We check for loose membrane, blistering, cracking, and aging. If something needs to be reinforced or resealed, we handle it.
4. Flashing and Sealant Checks
We review every flashing point — HVAC curbs, skylights, vents, pipes — and make sure all sealant is watertight and ready for winter.
5. Interior Leak Monitoring
We check ceilings, walls, and upper-level rooms for any signs of moisture so issues are caught long before they become serious.
6. Professional Year-Round Support
You get a professional team who understands Midwest weather and commercial roofing — so you never have to guess or worry.
7. Documentation and Ongoing Records
We document all inspections and repairs so you know your roof’s exact condition through each season.
Winter is unpredictable. Your roof doesn’t have to be.
The easy next step
If you want your commercial roof to last longer, cost less to maintain, and stay protected through every Indiana winter, the simplest move is to let a professional team stay ahead of the problems for you.
American Builders is local. We know Elkhart. We know Northern Indiana weather. And we know what your roof needs to stay strong.
Reach out to American Builders today to schedule your winter inspection or to enroll in our Commercial Roof Maintenance Plan.
Your future self — and your roof — will thank you.